Beyond the UI: Understanding Modern Frontend Engineering · Part 1
The Browser Rendering Pipeline Explained: From HTML to Pixels
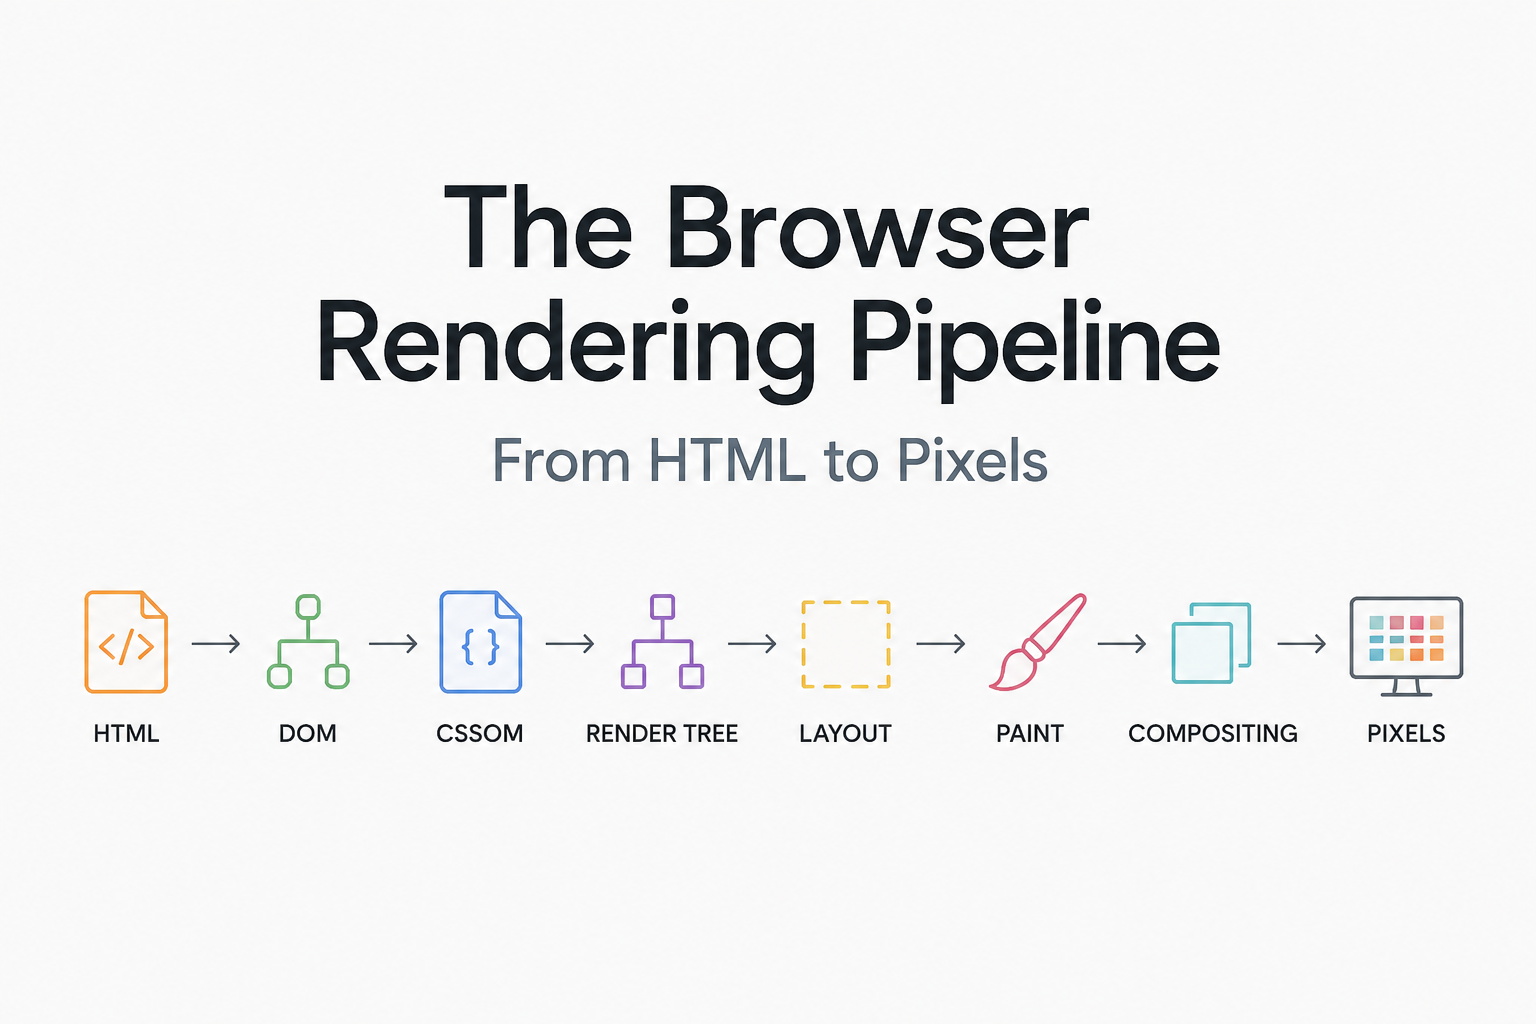
“You write HTML and CSS. The browser’s job is to somehow turn them into pixels. What happens in between is one of the most important things a frontend developer can understand.”
Open a browser and visit almost any website. Within milliseconds, text appears, buttons take shape, images load, colors fill the screen, and complex layouts arrange themselves into something you can interact with.
As developers, we usually think about the code responsible for that interface. We write something like:
1
2
3
4
5
<div class="card">
    <h2>Welcome Back</h2>
    <p>You have 3 new notifications.</p>
    <button>View Notifications</button>
</div>
Then we add some CSS:
1
2
3
4
5
6
7
8
.card {
    padding: 24px;
    border-radius: 12px;
}

.card h2 {
    font-size: 24px;
}
We refresh the browser and see a card. It feels almost instantaneous. But the browser cannot display HTML, and it cannot display CSS either. Your monitor ultimately understands pixels.
Somewhere between receiving this:
1
<h1>Hello World</h1>
and displaying Hello World on the screen, the browser has to parse the document, understand its structure, determine which CSS rules apply, calculate the size and position of elements, determine what needs to be drawn, organize those drawings into layers, and finally send the result to the screen.
That journey is known as the browser rendering pipeline.
At a high level, it looks something like this:
1
2
3
4
5
6
7
8
9
10
11
12
13
14
15
16
17
18
19
20
21
22
23
24
25
26
HTML
 │
 ▼
DOM

CSS
 │
 ▼
CSSOM

DOM + CSSOM
     │
     ▼
 Render Tree
     │
     ▼
   Layout
     │
     ▼
   Paint
     │
     ▼
Compositing
     │
     ▼
   Pixels
Understanding this pipeline changes the way you think about frontend development. Suddenly, performance problems such as layout thrashing, expensive animations, unnecessary repaints, and large stylesheets stop feeling mysterious. You begin to understand why certain operations are expensive rather than simply memorizing that they should be avoided.
So let’s follow a webpage from the moment the browser receives its HTML to the moment pixels appear on your screen.
Step 1: The Browser Receives HTML
Suppose you navigate to:
1
https://example.com
After the networking work required to obtain the document, the browser begins receiving HTML. Importantly, it doesn’t necessarily wait for the entire document before doing anything. HTML can be processed progressively as bytes arrive over the network.
Imagine the server sends:
1
2
3
4
5
6
7
8
9
10
11
12
13
14
15
16
17
<!DOCTYPE html>
<html>
<head>
    <title>My Store</title>
</head>

<body>
    <main>
        <h1>Products</h1>

        <div class="product">
            <h2>Laptop</h2>
            <p>KES 75,000</p>
        </div>
    </main>
</body>
</html>
To us, this is a text document. To the browser, it’s a set of instructions describing the structure of a page. The first major job is converting that text into something the browser can work with. That something is the DOM.
Step 2: Building the DOM
DOM stands for Document Object Model. The browser parses the HTML and converts its elements into a tree of objects. Our previous HTML becomes conceptually similar to this:
1
2
3
4
5
6
7
8
9
10
11
12
13
14
15
16
17
18
19
20
21
22
Document
│
└── html
    │
    ├── head
    │   └── title
    │       └── "My Store"
    │
    └── body
        │
        └── main
            │
            ├── h1
            │   └── "Products"
            │
            └── div.product
                │
                ├── h2
                │   └── "Laptop"
                │
                └── p
                    └── "KES 75,000"
This tree is the DOM. The DOM isn’t simply a copy of the HTML file. It’s the browser’s in-memory representation of the document. That’s why JavaScript can do things like:
1
2
3
const title = document.querySelector("h1");

title.textContent = "Featured Products";
JavaScript isn’t editing your original HTML file. It’s modifying the DOM that the browser constructed from it. Once that DOM changes, the browser may need to perform additional rendering work so the screen reflects the new state.
We’ll come back to that shortly. For now, we have structure. But the browser still doesn’t know what the page should look like. For that, it needs CSS.
Step 3: Building the CSSOM
Suppose our document references a stylesheet.
1
<link rel="stylesheet" href="/styles.css">
And that stylesheet contains:
1
2
3
4
5
6
7
8
9
10
11
12
body {
    font-family: Arial, sans-serif;
}

.product {
    padding: 20px;
    border: 1px solid #ddd;
}

.product h2 {
    font-size: 24px;
}
Just as the browser doesn’t directly work with raw HTML when rendering the page, it doesn’t simply treat CSS as a collection of strings. It parses the CSS and constructs another representation called the CSS Object Model, or CSSOM.
Conceptually:
1
2
3
4
5
6
7
8
9
10
11
12
CSSOM
│
├── body
│   └── font-family: Arial
│
└── .product
    │
    ├── padding: 20px
    ├── border: 1px solid #ddd
    │
    └── h2
        └── font-size: 24px
The real CSSOM is considerably more sophisticated because CSS involves inheritance, specificity, cascading rules, media queries, browser defaults, and many other considerations. But the important idea is simple. The browser now has two important pieces of information.
The DOM tells it:
What exists?
The CSSOM helps determine:
What should it look like?
Now the browser can begin combining them.
Step 4: Creating the Render Tree
The browser doesn’t simply draw every node in the DOM. Some elements shouldn’t appear on screen.
Consider:
1
2
3
4
5
6
7
<div class="message">
    Payment successful
</div>

<div class="debug">
    Internal debugging information
</div>
With:
1
2
3
.debug {
    display: none;
}
The .debug element exists in the DOM. JavaScript can still find it.
1
document.querySelector(".debug");
But it doesn’t need to be rendered. This is why the browser constructs another structure: the render tree. The render tree combines relevant DOM nodes with their computed styles and contains the visual elements that need to participate in layout and painting.
Conceptually:
1
2
3
4
5
6
7
8
9
DOM                       CSSOM
 │                          │
 └────────────┬─────────────┘
              │
              ▼
         Render Tree
              │
      Visible elements
      + computed styles
An element with:
1
display: none;
doesn’t generate a box in the render tree.
There are some important subtleties here. For example:
1
visibility: hidden;
is different. The element is invisible, but it still occupies space in the layout. Understanding these differences becomes important when optimizing interfaces.
At this point, the browser knows what needs to be rendered and how it should look. But there’s still one major question. Where exactly should everything go?
Step 5: Layout: Calculating Geometry
Consider this CSS:
1
2
3
4
5
6
7
8
.container {
    width: 80%;
}

.card {
    width: 50%;
    padding: 20px;
}
What does 50% actually mean in pixels? That depends on the size of the parent, and the parent’s size might depend on its parent. The browser therefore needs to calculate the geometry of the page. This stage is commonly called layout.
During layout, the browser determines things such as:
- Element width
- Element height
- X position
- Y position
- Margins
- Padding
- Relationships between elements
Imagine a viewport that is 1200 pixels wide.
If:
1
2
3
.container {
    width: 80%;
}
then the container may become:
1
960px
A child with:
1
width: 50%;
may therefore become:
1
480px
The browser performs these calculations throughout the relevant layout tree. The result might conceptually look like:
1
2
3
4
5
6
7
8
9
10
11
12
13
Viewport: 1200 × 800

┌───────────────────────────────────────┐
│ Header                                │
│ x: 0   y: 0                           │
│ width: 1200   height: 80              │
├───────────────────────────────────────┤
│                                       │
│   Product Card                        │
│   x: 120   y: 120                     │
│   width: 480   height: 220            │
│                                       │
└───────────────────────────────────────┘
The browser now knows exactly where elements belong. And this is where frontend performance starts becoming particularly interesting.
Why Layout Can Be Expensive
Suppose JavaScript changes the width of an element.
1
element.style.width = "800px";
That change may affect much more than that one element. Its children may need to move. Its siblings may need to move. Its parent’s dimensions might change. Other parts of the page may need to be recalculated. The browser may therefore need to perform layout again. This is commonly referred to as reflow.
Consider a list:
1
2
3
4
5
6
7
8
9
┌─────────────────────┐
│ Item 1              │
├─────────────────────┤
│ Item 2              │
├─────────────────────┤
│ Item 3              │
├─────────────────────┤
│ Item 4              │
└─────────────────────┘
If Item 1 suddenly becomes three times taller, Items 2, 3, and 4 may all need new positions. One small change has affected several elements. This is why repeatedly modifying layout-related properties can hurt performance, especially on complex pages.
But calculating positions still doesn’t put anything on the screen. The browser now needs to draw.
Step 6: Paint: Turning Elements Into Drawing Instructions
Once layout is complete, the browser knows what should appear and where it belongs. Now it needs to determine how to draw it. This is the paint stage.
Consider a button:
1
2
3
4
5
6
button {
    background: blue;
    color: white;
    border-radius: 8px;
    box-shadow: 0 4px 10px rgba(0,0,0,.2);
}
Painting may involve drawing:
- The background
- The border
- The text
- The rounded corners
- The shadow
The browser creates painting instructions representing these visual operations.
Conceptually:
1
2
3
4
5
6
7
8
9
10
11
12
13
14
15
16
17
Layout

Button:
x = 100
y = 200
width = 160
height = 48

        │
        ▼

Paint

Draw background
Draw border
Draw shadow
Draw text
Some visual effects are considerably more expensive to paint than others. Large shadows, complex gradients, filters, and large areas that change frequently can increase rendering work. This is why performance problems aren’t always caused by JavaScript. Sometimes the browser simply has too much visual work to perform.
Step 7: Compositing
Modern webpages are often too complicated to paint as one giant flat image every time something changes. Browsers can divide parts of the page into separate compositing layers.
Imagine a page containing:
1
2
3
4
5
6
7
8
9
Background

Content

Navigation

Modal

Animation
Conceptually, the browser might treat these as layers:
1
2
3
4
5
6
7
8
9
10
11
12
13
14
15
          ┌─────────────┐
          │    Modal    │
          └─────────────┘
                 ▲
          ┌─────────────┐
          │ Navigation  │
          └─────────────┘
                 ▲
          ┌─────────────┐
          │   Content   │
          └─────────────┘
                 ▲
          ┌─────────────┐
          │ Background  │
          └─────────────┘
During compositing, those layers are assembled in the correct order to produce the final image. This is especially important for animations.
Suppose you animate an element using:
1
transform: translateX(200px);
In favorable cases, the browser can move an already-painted composited layer rather than recalculating the layout and repainting large parts of the page.
Compare that with repeatedly changing:
1
left: 200px;
Depending on the page and positioning context, changing left may trigger layout and subsequent rendering work. This is one reason frontend performance advice often recommends animating properties such as:
1
2
transform
opacity
when appropriate. The recommendation isn’t arbitrary. It comes directly from understanding how browsers render pages.
Putting the Entire Pipeline Together
We can now see the full journey.
1
2
3
4
5
6
7
8
9
10
11
12
13
14
15
16
17
18
19
20
21
22
23
24
25
26
27
28
29
30
31
32
33
34
35
                 HTML
                   │
                   ▼
              Parse HTML
                   │
                   ▼
                  DOM

                 CSS
                   │
                   ▼
               Parse CSS
                   │
                   ▼
                 CSSOM

           DOM + CSSOM
                   │
                   ▼
              Render Tree
                   │
                   ▼
                Layout
          Size + Position
                   │
                   ▼
                 Paint
         Drawing Instructions
                   │
                   ▼
              Compositing
            Combine Layers
                   │
                   ▼
                 Pixels
What started as text has become something visible on a screen. And the process happens incredibly quickly.
Where JavaScript Enters the Picture
So far, we’ve mostly discussed HTML and CSS. But modern applications are highly dynamic. JavaScript constantly modifies the page.
Consider:
1
2
3
const card = document.querySelector(".card");

card.style.width = "600px";
Changing the width affects geometry. The browser may need to perform:
1
2
3
4
5
6
7
8
9
10
11
12
13
JavaScript
    │
    ▼
DOM / Style Change
    │
    ▼
Layout
    │
    ▼
Paint
    │
    ▼
Composite
Now consider:
1
card.style.backgroundColor = "red";
The geometry hasn’t changed. The card remains exactly where it was. The browser may therefore avoid layout and perform only the later rendering stages.
Conceptually:
1
2
3
4
5
6
7
8
9
10
JavaScript
    │
    ▼
Style Change
    │
    ▼
Paint
    │
    ▼
Composite
And for some composited animations:
1
card.style.transform = "translateX(100px)";
the browser may be able to perform primarily compositing work rather than recalculating the entire layout.
Conceptually:
1
2
3
4
5
6
7
JavaScript
    │
    ▼
Transform
    │
    ▼
Composite
The exact behavior depends on the browser and page, so these diagrams should be treated as useful mental models rather than rigid guarantees. But they reveal an important principle:
Not every visual change costs the browser the same amount of work.
Why This Matters for Frontend Developers
It’s easy to treat browser performance as something only framework authors need to worry about. But your everyday decisions influence this pipeline. When you manipulate the DOM thousands of times, you’re interacting with it. When you animate dimensions, you’re interacting with it. When you ship enormous stylesheets, you’re interacting with it. When you build deeply nested layouts, you’re interacting with it. When you repeatedly read layout information and immediately modify styles, you’re interacting with it.
Frameworks don’t eliminate the browser rendering pipeline. React still ends up modifying the DOM. Vue still ends up modifying the DOM. Angular still ends up modifying the DOM. Svelte still ends up modifying the DOM. Eventually, every web framework reaches the same destination:
1
2
3
4
5
6
7
8
9
10
11
12
13
14
15
16
17
18
19
Framework

   │

   ▼

DOM Changes

   │

   ▼

Browser Rendering Pipeline

   │

   ▼

Pixels
Understanding the browser therefore gives you knowledge that survives whichever framework becomes popular next.
A Practical Example
Imagine you’re building an animation. You write:
1
2
3
4
5
6
7
8
function move() {
    element.style.left =
        `${element.offsetLeft + 1}px`;

    requestAnimationFrame(move);
}

move();
Every frame, the code reads offsetLeft and then changes left. The browser may need layout information to answer the read, and the subsequent write can invalidate layout again. On a simple page, you may never notice. On a large application with hundreds or thousands of elements, repeated layout work can become expensive.
Now consider an animation using transforms:
1
2
3
4
5
6
7
8
9
10
11
12
let position = 0;

function move() {
    position += 1;

    element.style.transform =
        `translateX(${position}px)`;

    requestAnimationFrame(move);
}

move();
This gives the browser more opportunity to handle the animation efficiently through compositing.
Again, the point isn’t:
“
transformis magically fast.”
The important lesson is understanding why some changes can require less work from the rendering pipeline than others. Once you understand that, frontend optimization becomes reasoning rather than memorization.
The Browser Has a Frame Budget
Smooth interfaces usually aim for approximately 60 frames per second on a 60 Hz display. That gives the browser roughly:
1
1000ms / 60 ≈ 16.7ms
to produce each frame.
Within that small window, the browser may need to:
1
2
3
4
5
6
7
8
9
10
11
12
13
14
15
16
17
18
19
20
21
JavaScript

↓

Style Calculation

↓

Layout

↓

Paint

↓

Composite

↓

Display Frame
If the work takes significantly longer than the available frame time, the browser may miss a frame. Users experience that as:
- Jank
- Stuttering
- Delayed interactions
- Choppy animations
- An interface that simply feels slow
This is why a page can load quickly and still feel terrible to use. Performance isn’t only about how quickly resources download. It’s also about how efficiently the browser can respond to changes after the page has loaded.
Common Rendering Performance Mistakes
Understanding the pipeline makes several common frontend mistakes easier to recognize. One is changing layout properties continuously during animations. Another is performing large numbers of DOM operations individually when they could be grouped together. Developers can also accidentally force repeated layout calculations by alternating between reading geometry and modifying styles. Large and unnecessary visual effects can make painting more expensive. Creating too many compositing layers can consume additional memory rather than improving performance.
And perhaps most importantly, developers sometimes optimize based on rules they’ve memorized instead of measuring what the browser is actually doing. Modern browser developer tools can show you layout work, painting, long tasks, frame timings, and other performance information. Use them.
The rendering pipeline gives you the mental model. Profiling tells you what your particular application is actually doing.
Bringing It All Together
When you write:
1
<button>Buy Now</button>
the browser does far more work than the simplicity of that line suggests. It parses the HTML. It constructs the DOM. It processes CSS and builds the CSSOM. It determines which elements need to participate in rendering. It calculates their dimensions and positions. It generates painting instructions. It organizes visual content into layers where appropriate. Finally, it composites everything into the pixels you see on your screen.
1
2
3
4
5
6
7
8
9
10
11
12
13
14
15
16
17
18
19
HTML ──────► DOM
               │
               │
CSS ───────► CSSOM
               │
               ▼
          Render Tree
               │
               ▼
            Layout
               │
               ▼
             Paint
               │
               ▼
          Compositing
               │
               ▼
             Pixels
And whenever your application changes the page, parts of that process may happen again. That’s why understanding browser rendering is so useful. It transforms frontend performance from a collection of mysterious rules into something you can reason about.
Final Thoughts
Frontend development is often taught from the framework downward. Learn React. Learn Vue. Learn Angular. Learn Next.js. Those tools are useful, but underneath every one of them sits the browser.
The browser doesn’t know that your application uses React. It doesn’t care whether your state came from Redux, Zustand, Pinia, signals, or a server component. Eventually, something needs to become HTML, styles, layout, drawing instructions, and pixels.
Understanding that journey gives you a foundation that isn’t tied to any particular framework. The next time an animation stutters, a page becomes sluggish after a DOM update, or a seemingly harmless CSS change causes unexpected performance problems, you’ll have a much better question to ask than:
“Why is the browser slow?”
You can ask:
“Which part of the rendering pipeline am I forcing the browser to repeat?”
And that’s a much more useful question.
What’s Next?
We’ve seen how the browser transforms HTML and CSS into pixels. But we also discovered something interesting along the way. Changing certain properties can force the browser to calculate layout again. Other changes may require repainting. Some animations can avoid much of that work and happen primarily during compositing.
So what exactly makes one visual update more expensive than another?
That’s where we’ll go next in Beyond the UI:
Reflow and Repaint Explained: Why Some UI Updates Are Expensive
We’ll explore what actually happens when the DOM changes, how layout thrashing occurs, why certain CSS properties are more expensive to animate, and how to build interfaces that remain smooth even as they become more complex.